
StyleSVG

Image to Stencil

Turn an image to stencil artwork you can actually cut. Upload a photo or drawing, let AI remove the background and reduce it to one or two bold tones, then download a clean vector stencil for a Cricut, a laser cutter or a craft knife. The preview is free.

Made for

The traced result as it is. You can adjust everything afterwards.

Drop your image here

PNG, JPG, WEBP or GIF · up to 25 MB · one free preview a day, no signup

Signed in? Pick up to 20 images at once.

Choose image
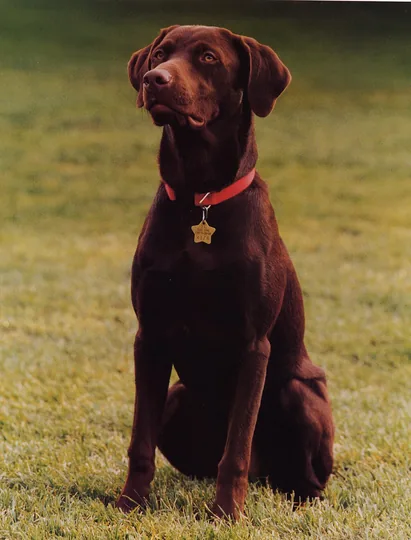
Chocolate Labrador sitting on a lawn, an ordinary colour photo
Before: a colour photo with grass behind the dog.
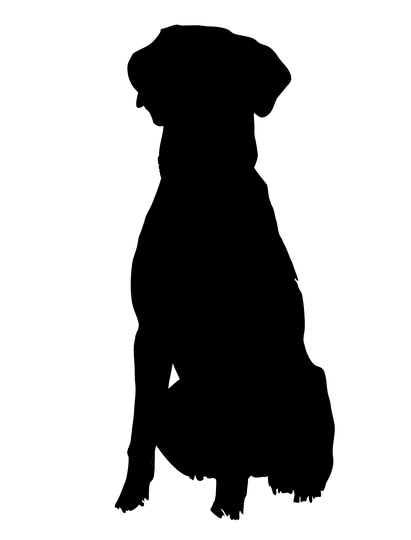
Solid black silhouette of the sitting Labrador on a transparent background | image to stencil
After: AI background removal, two tones, then the lighter tone deleted and the rest set to black.

What Makes a Good Stencil from a Photo?

A stencil is a sheet with shapes cut out so paint, ink or light can pass through. That is why a good image to stencil conversion needs a few large, closed shapes rather than the thousands of shades in a photograph.

Photo to stencil means simplifying

Every stencil starts by deciding what to keep. Faces, pets and logos survive as strong silhouettes with a few interior shapes; soft shading has to go. Our converter does the first pass for you by grouping the picture into one or two flat tones, and you decide which tone becomes the cut-out.

Vector stencils cut cleanly

Most online stencil makers give you a black-and-white JPG, which still has to be traced before a machine can cut it. The result here is already a vector: closed outlines that Cricut Design Space, LightBurn and other cutting software read directly, with no extra tracing step.

Image to vector stencil, step by step

Behind the scenes the image is first separated from its background, then traced into curves, then reduced to the number of tones you choose. Because every step works on vector paths, you can scale the finished stencil to a T-shirt, a wall or a pumpkin without jagged edges.

Vectorize an image →

Why Use Our Image to Stencil Converter?

Stencil makers that only threshold a photo leave you with speckled edges and a background you still have to erase. These features remove that clean-up work.

AI background removal first

Switch on AI background removal before uploading and the subject is cut out before tracing, so grass, walls and furniture never end up in the stencil. It costs one extra credit and makes the biggest difference on everyday photos.

Choose one, two or several tones

Set the number of colours to two for a classic single-layer stencil, then delete the lighter tone or recolour the darker one black. Keep three or four tones and turn on layers when you want a multi-layer stencil, with each tone on its own sheet.

SVG converter →

Closed shapes, no specks

Cutter-friendly mode closes every outline and removes specks smaller than a fraction of a percent of the image, so you are not weeding hundreds of tiny islands by hand. You can preview every change before you pay for anything.

How to Turn an Image into a Stencil in 3 Steps

Most image to stencil conversions take under two minutes, including the AI background removal.

1

Upload with the right options

Choose the Laser engraving use, which keeps two tones and closed outlines, and switch on AI background removal for photos. Then drop your JPG, PNG or WEBP onto the upload area at the top of the page.

2

Shape the stencil

When the preview appears, decide which tone to cut. Hide the lighter colour to leave a solid silhouette, or keep both tones as separate layers. Zoom in on thin areas such as legs, tails or letters that may need to stay attached.

3

Download and cut

Sign in with Google and your first file is free; later files are $6.99 each or part of a plan. Download the SVG for your cutter, or a PDF or PNG if you plan to print the stencil and cut it by hand.

See pricing →

Stencil Ideas That Work Well

Not every image to stencil job is the same. These projects suit a simplified, high-contrast design.

Pet and portrait silhouettes

A side view or a clear front view of a pet or person makes a recognisable silhouette for mugs, tote bags and wall art. Use a photo with an uncluttered background and good light; a phone picture saved as JPG works well.

JPG to SVG converter →

Pumpkin carving and painted signs

Print the image to stencil result at the size of your pumpkin or board, tape it on and trace the shapes. Two tones translate neatly into areas to carve deeply and areas to shave lightly.

Spray paint and screen printing

For spray paint, keep large shapes and check for floating islands that need a bridge. For screen printing, each tone becomes one screen; the PNG to EPS page explains which vector file print shops prefer.

PNG to EPS converter →

Image to Stencil FAQ

Ready to make your first stencil?

Make a stencil