
StyleSVG

Laser Cut Box Generator

Design a finger joint box in seconds with this free laser cut box generator. Enter the width, depth and height, your material thickness and the kerf of your laser, and get every panel with interlocking fingers that fit first time. Preview the assembled box in 3D, then download the cut file as SVG or DXF for LightBurn, xTool Creative Space, Glowforge or any CAD program.

Assembled finger joint box preview

Outside 120 × 80 × 60 mm · 6 panels on a 248.2 × 212.2 mm sheet

Units

Box size

These sizes are
Box type

Red 0.1 mm cut lines in millimetres, kerf already applied.

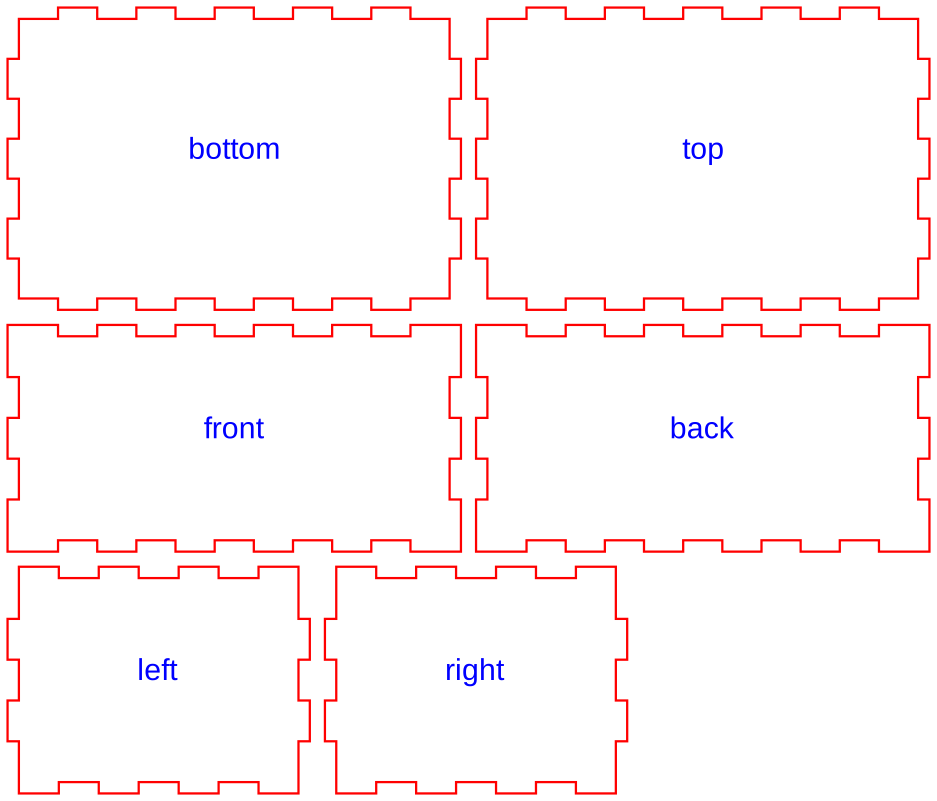
Cut layout with six finger-jointed panels labelled bottom, top, front, back, left and right
Before: six panels for a 120 × 80 × 60 mm box in 3 mm plywood, laid out for cutting.
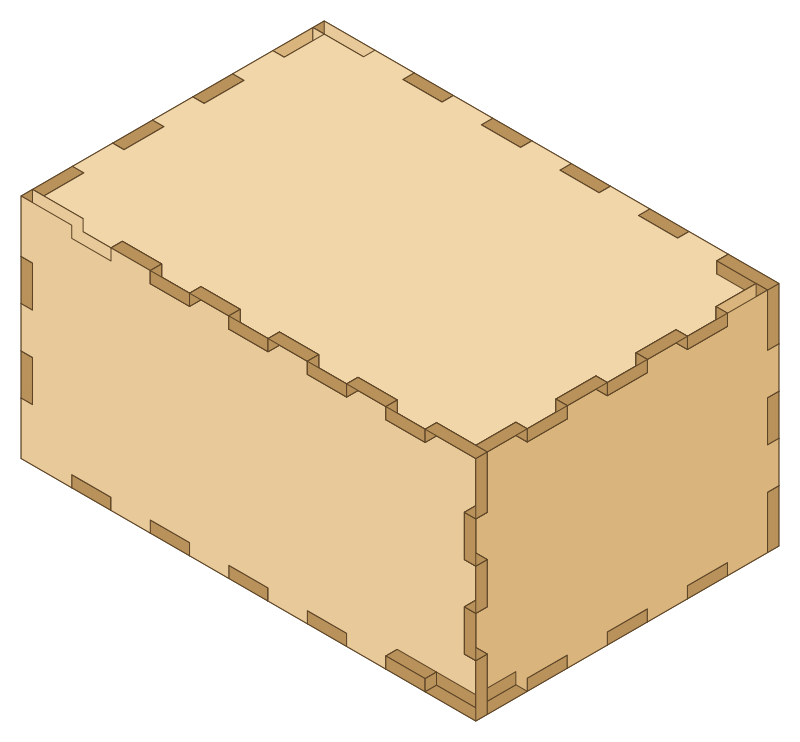
The same panels assembled into a closed wooden box with interlocking fingers | laser cut box generator
After: the assembled box, with fingers meeting at every edge and corner.

What Is a Laser Cut Box Generator?

A box cut from flat sheet needs its panels to lock together at the edges. Working out every finger by hand takes an evening in a CAD program; a generator does the geometry for you.

Finger joints that interlock

Each edge of the box is split into an odd number of fingers that alternate between the two panels meeting there, so the tabs of one slot into the gaps of the other. Corners are shared out so that every cube of material belongs to exactly one panel, with no gaps and no double layers.

Sized for your material

Plywood, MDF and acrylic are sold by thickness, but a 3 mm sheet is rarely exactly 3 mm. The finger depth follows the thickness you enter, and the kerf setting adds back the material the laser burns away, so joints are snug rather than loose.

From numbers to a cut file

You describe the box; the generator draws the panels, lays them out on your sheet and writes a vector file with closed cut paths in millimetres, ready to send to the laser without redrawing anything.

Why Use This Laser Cut Box Generator?

Many box makers need an account, a download or a fiddly form. This one runs instantly in your browser and shows you exactly what you will cut.

See it assembled before you cut

Switch between a 3D view of the finished box and the flat cut layout. The 3D view is drawn from the very same panel outlines that go into the file, so the fingers you see are the fingers you get.

Every setting that matters

Choose inside or outside dimensions, millimetres or inches, material thickness, kerf and finger width, and pick a closed box, an open-top tray or a box with a lift-off lid. Set your sheet width and the panels are arranged to fit your laser bed.

Clean files for any laser

The SVG and DXF contain one closed red hairline per panel, with kerf already applied, at real size in millimetres. Optional panel names can be added as blue text for engraving. It is free, needs no sign-up and nothing is uploaded.

How to Make a Laser Cut Box in 3 Steps

Measure your material first; everything else takes a minute.

1

Enter the size and material

Type the width, depth and height, say whether they are inside or outside measurements, then enter the material thickness and your laser's kerf. A finger width of about three times the thickness is a good start.

2

Choose the box type and check it

Pick closed, open top or lift-off lid. Look at the assembled view to confirm the proportions, then switch to the cut layout to see how the panels sit on your sheet.

3

Download and cut

Download the SVG or DXF, import it at 100 percent scale, set the red lines to cut and run a test on scrap first. Push the panels together, tap them home and add glue if the box should stay closed.

Tips for a Perfect Fit

A good laser cut box generator gets the geometry right; these habits get the fit right on your machine.

Cut a test corner first

Cut one small joint from the same sheet before the whole box. If it is loose, raise the kerf by 0.05 mm; if you need a mallet, lower it. Write the value down for that material.

Engrave line art on the lid

Lids look great with a name, a logo or a drawing scored into them. Turn a sketch into single strokes first so the laser draws each line once.

Centerline trace →

Add a photo as dots

To put a photograph on the lid, convert it to a halftone dot pattern so it engraves cleanly in one colour on wood or acrylic.

Halftone generator →

Laser Cut Box Generator FAQ

Ready to cut your box?

Design a box